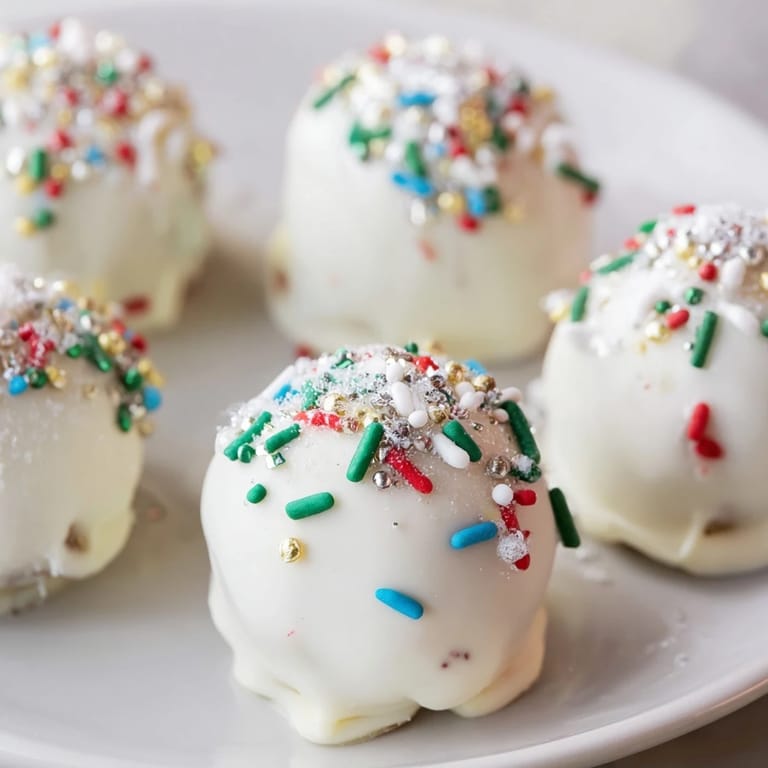
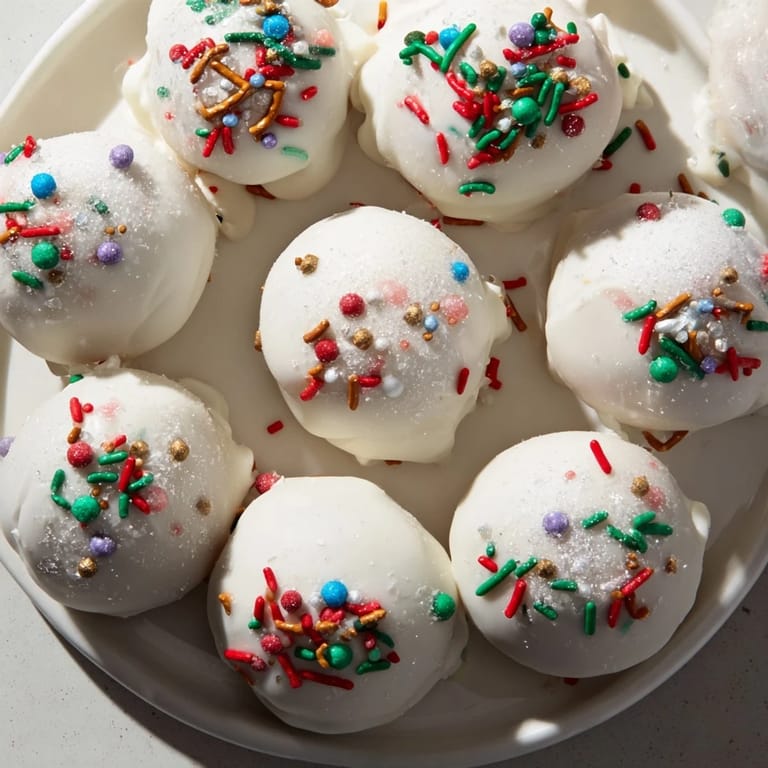
Holiday Ornament Candy Balls

Featured in: Sweet Little Treats

These holiday ornament candy balls blend finely crushed vanilla wafers with crunchy nuts and creamy peanut butter to form a rich, flavorful base. The dough is shaped into bite-sized balls, chilled for firmness, then dipped in melted white chocolate. Each ball is adorned with festive sprinkles and finished with a mini pretzel or licorice hook for a decorative touch. Ideal for holiday gifting or embellishing dessert tables, they offer a sweet, crunchy, and colorful treat with simple preparation and no baking required.

Updated on Tue, 09 Dec 2025 08:45:00 GMT
Festive Holiday Ornament Candy Balls, beautifully covered in white chocolate and colorful holiday sprinkles, ready to serve. Save
Festive Holiday Ornament Candy Balls, beautifully covered in white chocolate and colorful holiday sprinkles, ready to serve. | cookinget.com

Festive, colorful candy balls that resemble holiday ornaments perfect for gifting or decorating your dessert table.

I first made these during the holiday season and they were a huge hit among family and friends

Ingredients

  • Base: 2 cups vanilla wafer cookies, finely crushed, 1 cup powdered sugar, 1 cup finely chopped pecans or walnuts
  • Binding and Flavor: 1/2 cup creamy peanut butter, 1/4 cup unsalted butter, softened, 3 tbsp milk, 1 tsp vanilla extract
  • Coating & Decoration: 1 1/2 cups white chocolate chips or candy melts, Assorted holiday sprinkles, colored sugars, or edible glitter, Mini pretzel sticks or licorice strings (for ornament hooks)

Instructions

Step 1:
In a large bowl, combine crushed vanilla wafers, powdered sugar, and chopped nuts.
Step 2:
Add peanut butter, softened butter, milk, and vanilla extract. Mix until a thick, cohesive dough forms.
Step 3:
Roll dough into 1-inch balls and place on a parchment-lined tray.
Step 4:
Chill balls in the refrigerator for 15 minutes to firm up.
Step 5:
Meanwhile, melt white chocolate chips or candy melts according to package instructions.
Step 6:
Dip each chilled ball into melted chocolate, allowing excess to drip off.
Step 7:
Place dipped balls back onto the tray and immediately decorate with holiday sprinkles or edible glitter.
Step 8:
Before the coating sets, gently press a mini pretzel stick or small piece of licorice into each ball to create an ornament hook.
Step 9:
Refrigerate until set, about 10 minutes. Serve or package for gifting.
A close-up of vibrant Holiday Ornament Candy Balls, showing detailed sprinkle patterns and pretzel "hooks" for gifting. Save
A close-up of vibrant Holiday Ornament Candy Balls, showing detailed sprinkle patterns and pretzel "hooks" for gifting. | cookinget.com

Making these candy balls is a cherished family tradition that brings everyone together during the holidays

Required Tools

Mixing bowl, Spoon or spatula, Measuring cups and spoons, Baking tray, Parchment paper, Microwave-safe bowl (for melting chocolate)

Allergen Information

Contains: Peanuts or tree nuts (depending on nut choice), milk, gluten (unless using gluten-free wafers). May contain soy (in chocolate). Always check ingredient labels for potential allergens.

Nutritional Information

Calories: 140, Total Fat: 7 g, Carbohydrates: 17 g, Protein: 2 g per serving

Shiny Holiday Ornament Candy Balls, arranged on a tray, perfect for a holiday dessert display or party appetizer. Save
Shiny Holiday Ornament Candy Balls, arranged on a tray, perfect for a holiday dessert display or party appetizer. | cookinget.com

These candy balls are easy to customize and always impress at holiday gatherings

Recipe FAQs

Can I substitute peanut butter for allergies?

Yes, almond butter or sunflower seed butter can replace peanut butter to accommodate nut-free preferences.

What type of nuts work best in this treat?

Finely chopped pecans or walnuts complement the vanilla base well, adding a pleasant crunch and flavor.

How should these candy balls be stored?

Store them in an airtight container in the refrigerator for up to one week to maintain freshness and texture.

Is it possible to make these gluten-free?

Yes, substitute regular vanilla wafers with gluten-free vanilla wafers to suit gluten-sensitive diets.

Can I use different coatings besides white chocolate?

Dark or milk chocolate coatings work well as alternatives, allowing for variety in flavor and appearance.

Holiday Ornament Candy Balls

Festive candy balls featuring vanilla wafers, nuts, and white chocolate coating with holiday sprinkles.

Prep Duration
25 minutes
0
Overall Time
25 minutes
Recipe by Sophie Daniels


Skill Difficulty Easy

Cuisine American

Output 24 Portion Count

Diet Preferences Vegetarian Option

What You'll Need

Base

01 2 cups vanilla wafer cookies, finely crushed
02 1 cup powdered sugar
03 1 cup finely chopped pecans or walnuts

Binding and Flavor

01 1/2 cup creamy peanut butter
02 1/4 cup unsalted butter, softened
03 3 tablespoons milk
04 1 teaspoon vanilla extract

Coating and Decoration

01 1 1/2 cups white chocolate chips or candy melts
02 Assorted holiday sprinkles, colored sugars, or edible glitter
03 Mini pretzel sticks or licorice strings, for ornament hooks

Directions

Step 01

Combine Dry Ingredients: In a large bowl, mix crushed vanilla wafers, powdered sugar, and chopped nuts until evenly blended.

Step 02

Incorporate Binding Agents: Add peanut butter, softened butter, milk, and vanilla extract to the dry mixture; stir until a thick, cohesive dough forms.

Step 03

Form Balls: Shape the dough into 1-inch diameter balls and arrange them on a parchment-lined tray.

Step 04

Chill Dough Balls: Refrigerate the formed balls for 15 minutes to firm them up.

Step 05

Melt Coating: Melt white chocolate chips or candy melts following package directions until smooth.

Step 06

Dip and Decorate: Dip each chilled ball into the melted coating, allowing excess to drip off; return to tray and immediately adorn with sprinkles or edible glitter.

Step 07

Attach Ornament Hooks: Before the coating sets, gently press a mini pretzel stick or licorice piece into each ball to simulate ornament hooks.

Step 08

Set and Serve: Refrigerate for approximately 10 minutes until coating is firm; serve or package for gifting.

Essential Tools

  • Mixing bowl
  • Spoon or spatula
  • Measuring cups and spoons
  • Baking tray
  • Parchment paper
  • Microwave-safe bowl for melting chocolate

Allergy Details

Review all ingredients for allergens. Ask a medical expert when uncertain.
  • Contains peanuts or tree nuts depending on nut selection
  • Contains milk
  • Contains gluten unless gluten-free wafers are used
  • May contain soy from chocolate ingredients

Nutrition Facts (per portion)

These numbers offer reference only, not medical guidance.
  • Energy Value: 140
  • Fats: 7 g
  • Carbohydrates: 17 g
  • Proteins: 2 g