 Save
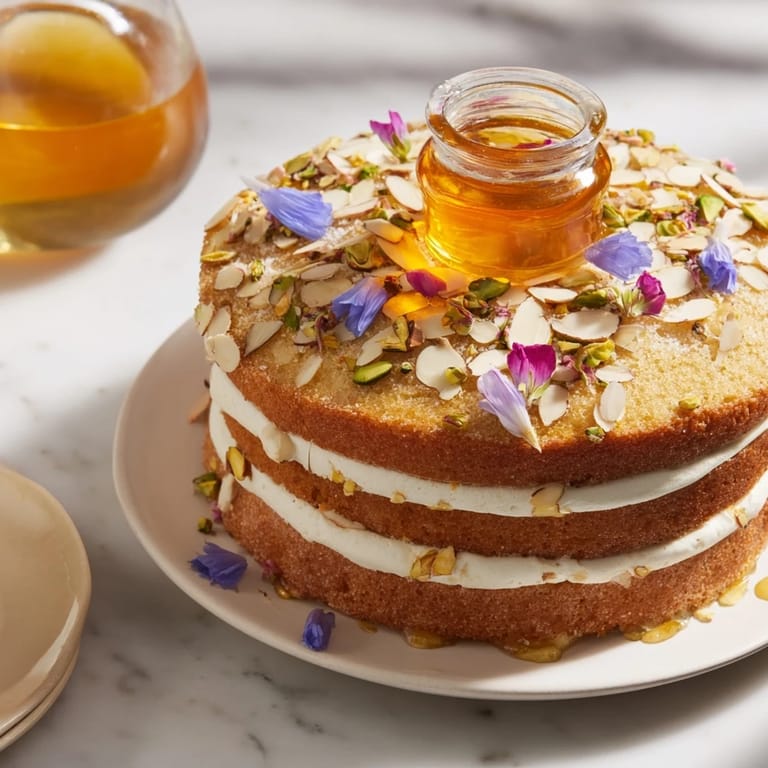
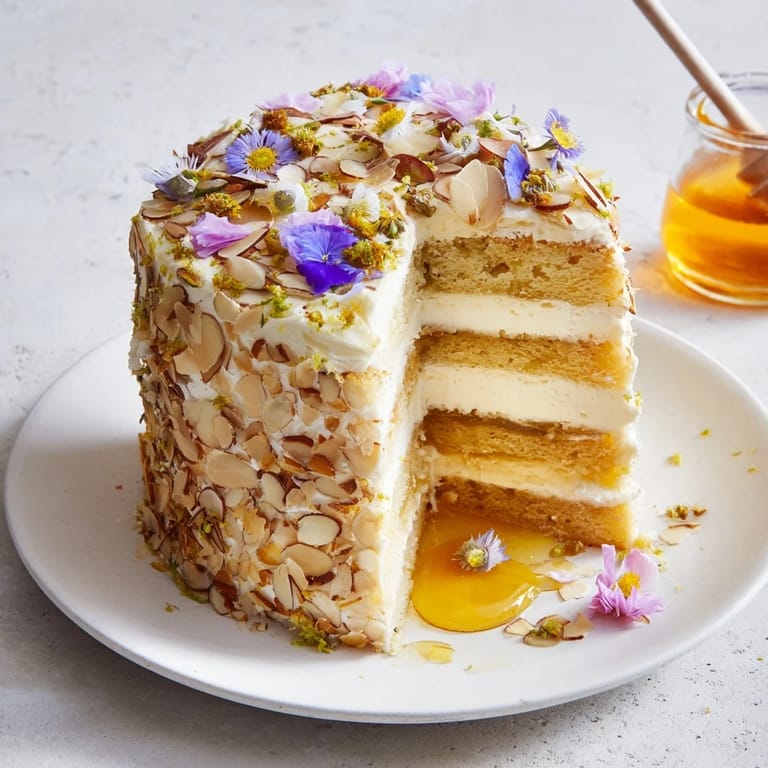
Save The first time I watched honey pour in a slow, golden stream across a dessert, I was mesmerized. It wasn't just the sweetness or the shine—it was the theater of it, the way guests leaned forward when that warm honey hit the plate. This Honey-Drip cake came from wanting to capture that exact moment, to build an entire dessert around honey's most irresistible qualities. Layered, creamy, and topped with a pot of liquid gold that guests can dip into themselves, it's become the centerpiece of every special occasion I host.
I made this for a dinner party last spring when a friend mentioned she'd never had honey as the star ingredient in a dessert before. Watching her expression when that first bite hit the honey pot, then seeing her go back for seconds—that's when I knew this recipe was special. It sparked a conversation about flavor and tradition that lasted through dessert and coffee, the kind of moment that reminds you why cooking for people matters.
Ingredients
- All-purpose flour: The foundation of your cake—measure it by spooning into your measuring cup rather than scooping directly from the bag to avoid compacting and adding extra flour than intended.
- Baking powder and baking soda: These work together to give the cake its tender crumb; don't skip whisking them into the dry ingredients, as lumps will create dense pockets.
- Unsalted butter and granulated sugar: Creaming these together for a full 2 minutes creates the air pockets that make this cake light and fluffy.
- Honey: Use it in the batter to add moisture and subtle floral notes, but save your best quality honey for the center pot where guests will taste it directly.
- Eggs and vanilla: These bring structure and depth; let them come to room temperature before mixing so they blend smoothly into the batter.
- Whole milk: The dairy balances honey's intensity and keeps the crumb tender throughout.
- Heavy cream and mascarpone: This filling is where the magic happens—mascarpone adds tang and richness that prevents the cream from tasting one-dimensional.
- Liquid honey for the center pot: Choose something you genuinely love tasting on its own, whether wildflower, acacia, or local varietal, because your guests will experience it with complete focus.
- Toasted almonds and edible flowers: These are your final visual moment; toast the almonds yourself rather than buying pre-toasted to control the depth of flavor.
Tired of Takeout? 🥡
Get 10 meals you can make faster than delivery arrives. Seriously.
One email. No spam. Unsubscribe anytime.
Instructions
- Set the stage:
- Preheat your oven to 350°F and prepare two 8-inch round pans by greasing them thoroughly and lining the bottoms with parchment paper. This small step prevents the frustration of a stuck cake and makes unmolding effortless.
- Whisk the dry foundations:
- In a medium bowl, combine your flour, baking powder, baking soda, and salt, whisking them together for about 30 seconds to distribute the leavening agents evenly. Any lumps that form will disappear into a silky mixture.
- Cream butter and sugar:
- Beat the softened butter and sugar together until the mixture is light, fluffy, and noticeably paler than it started—this takes about 2 minutes with an electric mixer. You're essentially whipping tiny air bubbles into the mixture, which is what gives the cake its delicate texture.
- Build the wet mixture:
- Add the honey, eggs one at a time, and vanilla extract to your creamed butter, beating well after each addition until everything is smoothly incorporated. The mixture should look glossy and homogeneous before you move to the next step.
- Combine wet and dry gently:
- Alternate adding your dry ingredients and milk to the wet mixture, starting and ending with dry, mixing only until just combined after each addition. Overmixing develops gluten and creates a tough, dense cake, so resist the urge to blend it into absolute smoothness.
- Fill the pans and bake:
- Divide the batter evenly between your prepared pans and smooth the tops with a spatula. Bake for 22 to 25 minutes until a toothpick inserted in the center comes out clean or with just a few moist crumbs, then transfer to a wire rack to cool completely—this step cannot be rushed.
- Prepare the honey cream:
- While the cakes cool, whip your heavy cream to soft peaks, then add the honey and mascarpone and whip to stiff peaks, being careful not to overbeat and turn it grainy. Chill this filling until you're ready to assemble, which keeps it stable and easy to spread.
- Slice and layer:
- Once the cakes are completely cool, carefully slice each layer horizontally to create four thin layers total, using a serrated knife or cake leveler if you have one. Place the first layer on your serving platter, spread a generous layer of honey cream, and repeat until all layers are stacked.
- Create the center honey well:
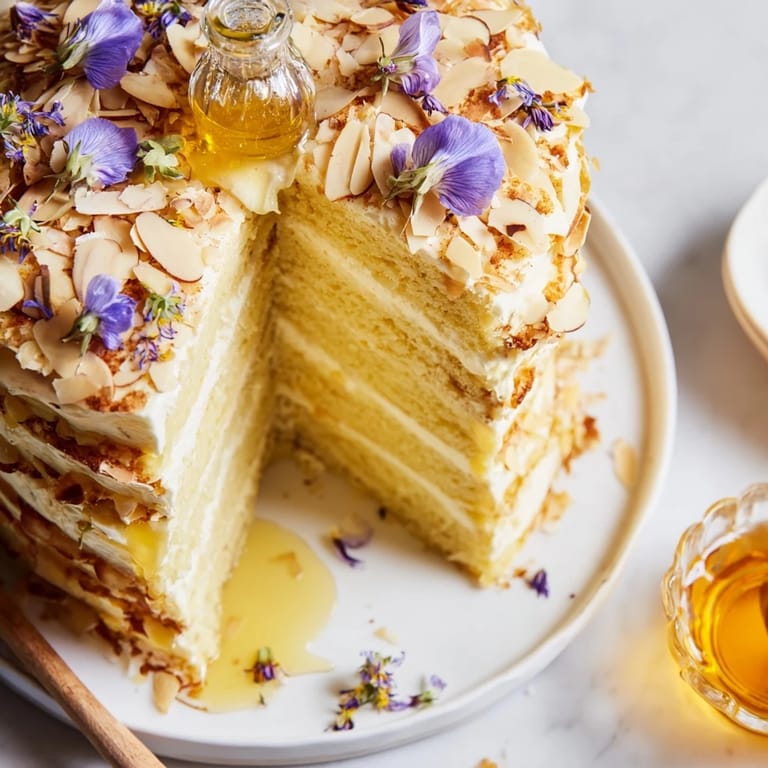
- Using a 3-inch round cutter, carefully cut a hole from the center of your stacked cake, removing the center column completely. Nestle a small glass or ceramic honey pot into this hole and fill it with your finest liquid honey, which will pool and drip as guests dip their bites.
- Garnish and rest:
- Top the cake with toasted almonds, edible flowers if desired, and a final drizzle of honey, then let it sit for at least 15 minutes before serving so the flavors settle and the structure firms up.
 Save
Save The real gift of this dessert hit me when a quiet guest who rarely says much suddenly smiled and said, 'I've never experienced honey this way before.' It turned a simple component into an adventure, which is exactly what food should do when it's made with intention.
Why This Cake Works as an Interactive Dessert
Plating a dessert is one thing, but inviting your guests to participate in eating it is something else entirely. By making the honey pot a central feature that people dip into, you're transforming a passive eating experience into an active one where they control how much honey reaches each bite. The layers underneath are substantial enough to hold together when they cut through them, and the honey cream acts as both a flavor bridge and a structural support that keeps everything cohesive. This interactivity also gives people time to linger at the table, because they can't rush through the eating experience the way they might with a plated dessert.
Honey Selection and Its Subtle Impact
The honey you choose for the center pot becomes the flavor story your guests experience most directly, so it deserves real consideration. Wildflower honey brings subtle complexity and a warm floral note that feels sophisticated without being perfume-like, while acacia honey is lighter and more delicate, letting the cake's sweetness take the lead. Local honey, especially if you have access to something from a farmer's market, carries a sense of place and story that guests appreciate when you mention it. I've experimented with orange blossom and lavender honey as well, and both create an unexpectedly elegant twist—the floral notes feel intentional rather than accidental, adding depth to what could otherwise be a straightforward honey-and-cake combination.
Making It Your Own
This cake is structured enough to serve as written, but flexible enough to adapt to your kitchen and preferences. If nuts aren't part of your household, the almonds can disappear entirely without affecting the recipe's success—the visual beauty might shift, but the taste will remain sophisticated. For a different flavor direction, consider infusing the honey cream with a touch of almond extract, orange zest, or even a whisper of lavender water stirred into the mascarpone before you whip it.
- Try whisking a tablespoon of honey directly into the batter for deeper honeyed flavor throughout the cake layers.
- If you want extra shine, dust the top with a light coating of edible luster dust right before serving, which catches the light beautifully.
- The cake layers can be baked up to a day ahead and stored wrapped at room temperature, then assembled with fresh honey cream on the day you serve it.
 Save
Save This cake has become my favorite kind of recipe—one that starts as an idea about flavor and becomes a reason to gather people around a table. Make it, serve it, and watch what happens when you hand control of the experience to your guests.
Recipe FAQs
- → What type of honey works best for this cake?
Wildflower or acacia honey are recommended for the central pot to provide floral aromas that complement the cake layers.
- → Can the cake be made nut-free?
Yes, simply omit the toasted almonds garnish to make the cake nut-free without compromising texture.
- → How is the honey cream filling prepared?
Heavy cream is whipped to stiff peaks, then gently folded with honey and mascarpone cheese for a smooth, rich filling.
- → How do you assemble the cake layers?
The baked cake is sliced horizontally into thin layers, each spread with honey cream before stacking to create a fluffy texture.
- → What tools are required for the honey pot insertion?
A 3-inch round cutter is used to create a hole in the stacked layers where a small glass or ceramic honey pot is placed and filled.
- → Any pairing suggestions for serving?
This dessert pairs beautifully with Moscato or late-harvest Riesling wines, enhancing its sweet and floral profile.