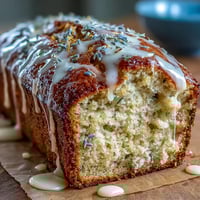
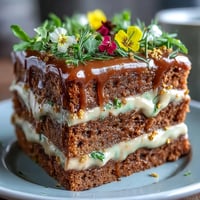
Save
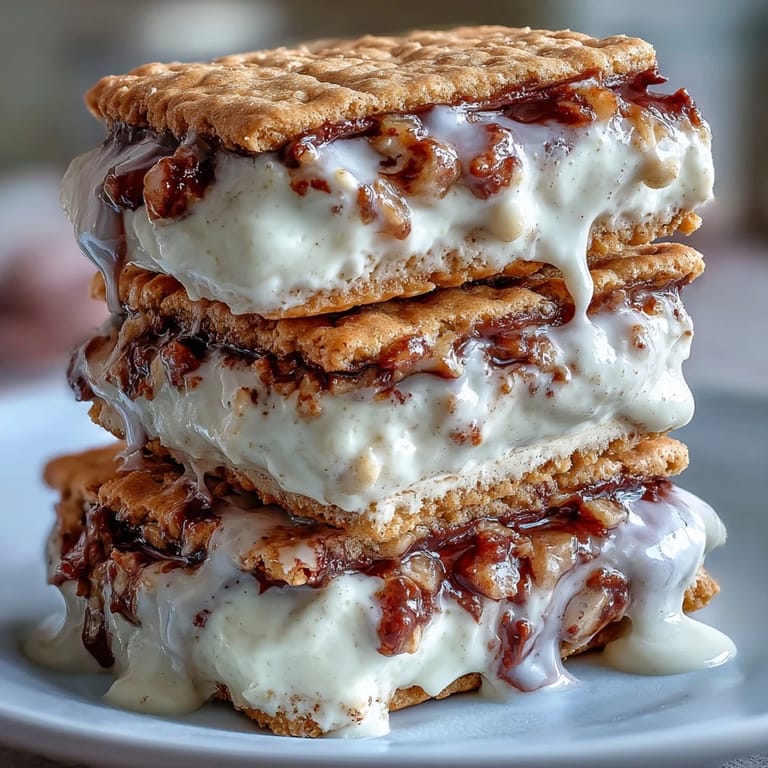
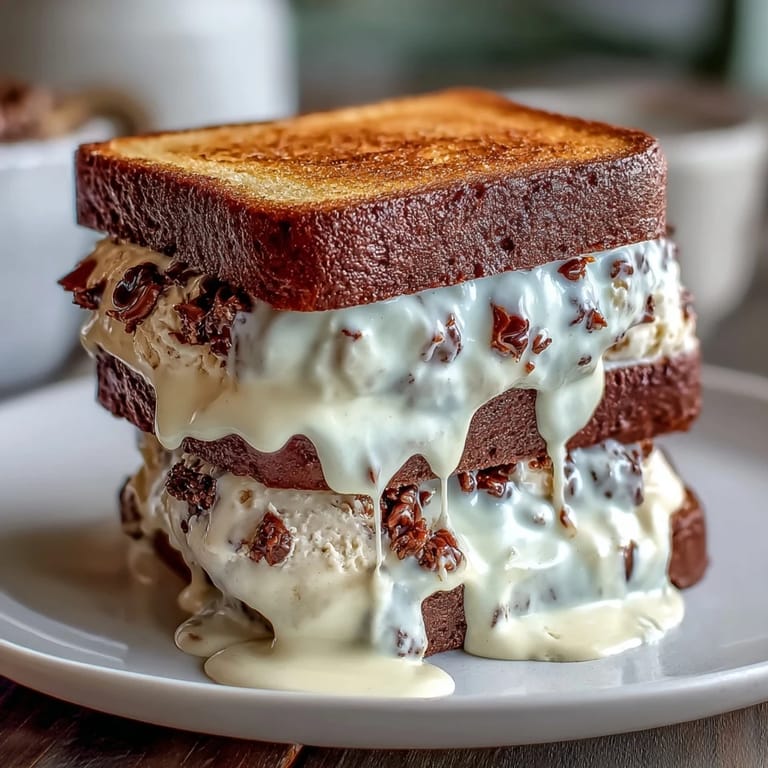
Save There's something about the smell of espresso powder hitting hot cream that instantly transported me back to a rainy Tuesday afternoon at my favorite corner café. I was watching the barista craft vanilla bean frappuccinos with such care, layering the flavors so perfectly, when it hit me: why not bring that magic home in cookie form? That day, I decided to chase that café feeling in my own kitchen, creating something that tastes like both dessert and a cold coffee shop dream.
I made these for my friend's book club last summer, and watching everyone's faces when they bit into one—that moment of realization that the cookie was still warm and the ice cream was melting perfectly—made me understand why people love baking. One woman actually closed her eyes, and someone else asked for the recipe before finishing their first sandwich. That's when I knew these weren't just treats; they were tiny moments of joy.
Ingredients
- Unsalted butter (1 cup, softened): This is your foundation for tender cookies; cold butter fights you, so let it sit on the counter until it gives when you press it gently.
- Light brown sugar and granulated sugar (1 cup plus 1/2 cup): The combination creates depth and moisture—brown sugar brings chewiness while granulated sugar helps with structure.
- Large eggs (2): Room temperature eggs integrate better and create a smoother dough; cold ones can cause lumps.
- Instant espresso powder (2 tbsp): Don't skip this or substitute with regular coffee; the powder dissolves completely and delivers concentrated flavor.
- Vanilla extract (1 tsp): A single quality ingredient makes the difference between flat and memorable.
- All-purpose flour (2 cups): Measure by scooping and leveling, not by dipping the cup straight in; over-packing creates dense cookies.
- Unsweetened cocoa powder (1/2 cup): This adds subtle chocolate notes that complement the espresso without overwhelming the vanilla ice cream.
- Baking soda and salt (1 tsp and 1/2 tsp): These seem minor, but they're essential for proper rise and flavor balance.
- Heavy cream (2 cups): Full-fat cream is non-negotiable for silky, luxurious ice cream.
- Whole milk (1 cup): The dairy base that keeps the ice cream scoopable and prevents crystallization.
- Granulated sugar for ice cream (3/4 cup): This sweetens the custard and affects the freezing point; less sugar means harder ice cream, more means mushier.
- Vanilla bean (1 whole, split and scraped): If you can find it, real vanilla bean creates tiny black specks that signal authenticity and deliver floral complexity; vanilla bean paste works beautifully as a shortcut.
- Pinch of salt: In ice cream, salt doesn't taste salty—it amplifies every other flavor.
Tired of Takeout? 🥡
Get 10 meals you can make faster than delivery arrives. Seriously.
One email. No spam. Unsubscribe anytime.
Instructions
- Heat your oven and prep your workspace:
- Set the oven to 350°F and line two baking sheets with parchment paper so you're not scrambling when the dough is ready to bake. This small step prevents cookies from sticking and ensures even browning on the bottom.
- Cream the butter and sugars into fluffy clouds:
- Beat them together for about 2 to 3 minutes until the mixture looks pale and airy—this is where air bubbles form that make cookies tender. If it still looks wet or grainy, keep going; patience here pays off.
- Add eggs and aromatics one at a time:
- Drop in one egg, beat until it disappears completely, then add the second egg and repeat. Once the espresso powder and vanilla hit the bowl, you'll smell the magic starting to happen—that's your cue to keep the mixer running for another 30 seconds.
- Combine dry ingredients separately:
- Whisk flour, cocoa powder, baking soda, and salt together in another bowl so you distribute the leavening evenly. This step prevents bitter pockets of baking soda that can ruin a cookie.
- Fold wet and dry together gently:
- Add the dry mixture to the wet mixture in two additions, mixing just until combined—overmixing toughens cookies. Stop as soon as you don't see flour streaks; a few lumps are better than overworked dough.
- Shape and bake the cookies:
- Drop rounded tablespoons of dough onto your sheets, leaving space between each one, and flatten them slightly with your palm. Bake for 10 to 12 minutes until the edges look set but the centers still feel slightly soft when you touch them gently; they'll firm up as they cool.
- Cool completely on a wire rack:
- Don't try to move them until they're fully cooled or they'll fall apart; this is a good time to start on the ice cream base.
- Heat cream, milk, and vanilla to release all the flavor:
- Combine everything in a saucepan and warm it over medium heat, stirring gently, until the sugar dissolves and you see steam rising. Watch it carefully—if it boils, it can break the custard.
- Cool the ice cream base completely before churning:
- This prevents the ice cream maker from having to work overtime; many people skip this and end up with icy results instead of creamy. Pour the mixture into a bowl and refrigerate for at least an hour.
- Churn according to your machine's instructions:
- Each machine works differently, so follow the timing on yours; most take 20 to 30 minutes to reach soft-serve consistency. Transfer to a container and freeze for at least 2 hours until firm enough to scoop.
- Assemble sandwiches with a gentle hand:
- Place one cookie flat-side up, add a generous scoop of ice cream, top with another cookie, and press very gently together. Work quickly so the ice cream doesn't melt; if it does, pop the assembled sandwich back in the freezer for 5 minutes.
- Give them time to set before serving:
- A final 30-minute freeze in the freezer lets the whole sandwich firm up and hold together beautifully when bitten. This step is the difference between a sandwich that falls apart and one that's elegant and satisfying.
 Save
Save I learned these lessons the hard way during my first attempt, when I rushed everything and ended up with melted ice cream dripping through barely-set cookies. Now I build in the time, and the payoff is worth every minute of waiting. There's something deeply satisfying about eating a frozen dessert you built with your own hands.
Making the Espresso Cookie Dough
The cookie dough itself is forgiving and delightful to work with—it smells like a coffee shop and cocoa powder, and it's darker than typical dough because of the espresso and cocoa. One thing I discovered is that these cookies are meant to be slightly underbaked; they should look barely set in the center when they come out of the oven. As they cool, they firm up but stay chewy, which is exactly what you want when you're sandwiching them around cold ice cream.
Churning Your Own Ice Cream
If you don't have an ice cream maker, store-bought vanilla bean ice cream is genuinely a respectable shortcut—this recipe is about the cookie-ice cream combination, not proving your ice cream-making credentials. However, if you do churn your own, you'll taste the difference immediately: the vanilla bean specks are visible, the texture is silkier, and you control exactly how sweet it is. The first time I churned this, I stood at the machine watching the mixture transform from liquid to soft-serve, and I felt like I'd unlocked some ancient kitchen secret.
Storage and Serving Ideas
These sandwiches live happily in your freezer for up to two weeks in an airtight container, though they rarely last that long in my experience. They're perfect for summer gatherings, elegant enough for dinner parties, and casual enough to sneak out of the freezer at midnight. If you want to dress them up, roll the edges in mini chocolate chips, crushed espresso beans, or even a combination of both while the ice cream is still slightly soft—it's a tiny detail that makes them feel special and intentional.
- Let them sit at room temperature for 2 to 3 minutes before serving if they're too frozen to bite through comfortably.
- Make extra cookies without ice cream and freeze them separately for spontaneous sandwich assembly.
- These pair beautifully with cold milk, espresso, or even a scoop of extra ice cream on the side.
 Save
Save These ice cream sandwiches are proof that great desserts don't need to be complicated—they just need care and a willingness to let flavors come together slowly. Make a batch this weekend and taste what happens when a café favorite becomes something you can pull from your own freezer whenever joy is needed.
Recipe FAQs
- → What gives the cookies their coffee flavor?
Instant espresso powder is incorporated into the dough, providing a robust coffee essence that pairs well with the vanilla bean ice cream.
- → Can I use store-bought ice cream?
Yes, high-quality vanilla bean ice cream can be used as a convenient alternative to homemade churned ice cream.
- → How should the sandwiches be stored?
Keep assembled sandwiches in an airtight container in the freezer for up to two weeks to maintain freshness and texture.
- → What is the best way to serve these sandwiches?
Serve after freezing the assembled sandwiches for at least 30 minutes to ensure optimal firmness and a refreshing bite.
- → Are there optional add-ons for extra texture?
Rolling sandwich edges in mini chocolate chips or crushed espresso beans adds a pleasant crunch and enhances flavor complexity.