 Save
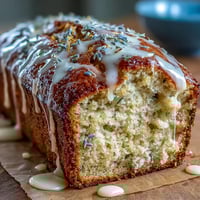
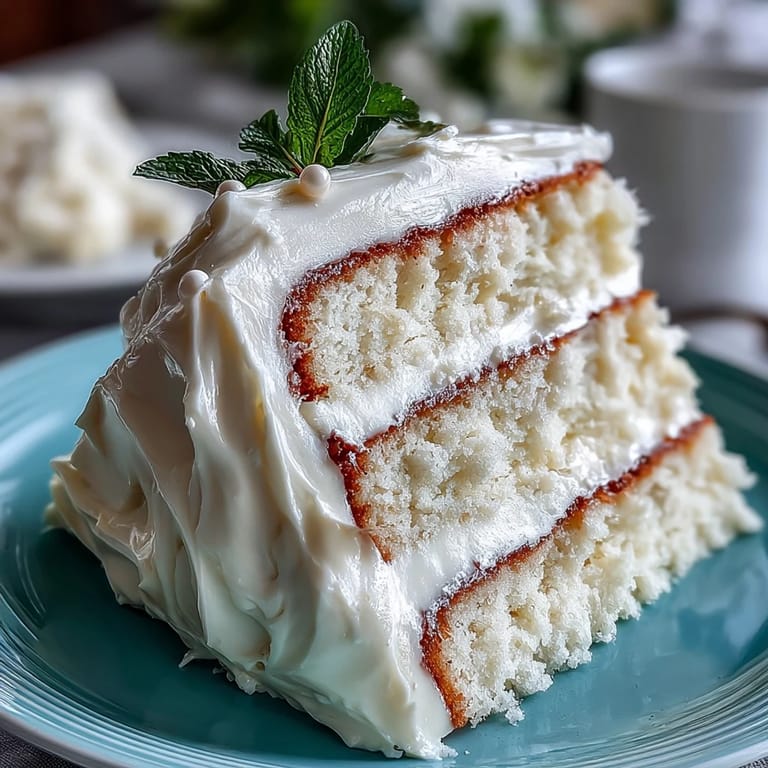
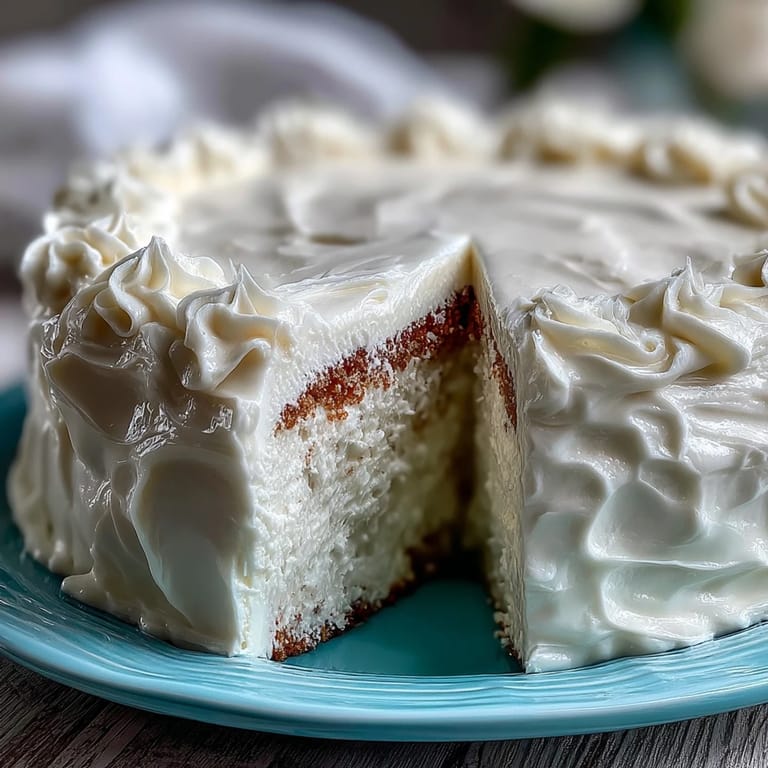
Save There's something about baking a cake for a milestone that makes your hands move differently in the kitchen. When my cousin asked me to make the cake for her daughter's First Communion, I found myself wanting something that felt both celebratory and elegant—not overly fussy, but undeniably special. A sheet cake seemed right, something that could feed a crowd without pretension, but when I discovered how beautifully fondant could transform it into something that looked like it belonged in a fancy bakery, I knew I'd found the one. This cake has since become my go-to for any occasion that deserves a little shimmer.
I'll never forget watching the kids at that first Communion party lean in close to examine the fondant, running their fingers gently over the pearl decorations like they were touching something precious. The adults kept coming back for seconds, which honestly surprised me—they expected it to be all looks and no flavor, but that buttermilk-tender crumb won them over immediately. My cousin pulled me aside later and asked if I'd make it for every family celebration from that point on, which felt like the highest compliment a baker could receive.
Ingredients
- All-purpose flour (3 cups): This is your structure—don't skip sifting or measuring by weight if you have a scale, as packed flour can throw off the whole texture.
- Baking powder (2½ tsp): This gives you that tender crumb without making the cake gummy or dense.
- Granulated sugar (2 cups): Creaming this with butter until light and fluffy is non-negotiable—that's where the delicate texture begins.
- Unsalted butter (1 cup plus 1 cup): Room temperature is absolutely critical; cold butter won't incorporate properly and you'll end up with a dense cake.
- Eggs (4 large): Room temperature eggs blend smoothly into the batter—cold ones can cause separation and uneven crumb.
- Whole milk (1¼ cups): The liquid keeps the cake tender, and whole milk's fat content matters more than you'd think for moisture retention.
- Vanilla extract (1 tbsp): Pure vanilla, not imitation—it's the difference between a cake that tastes good and one that tastes memorable.
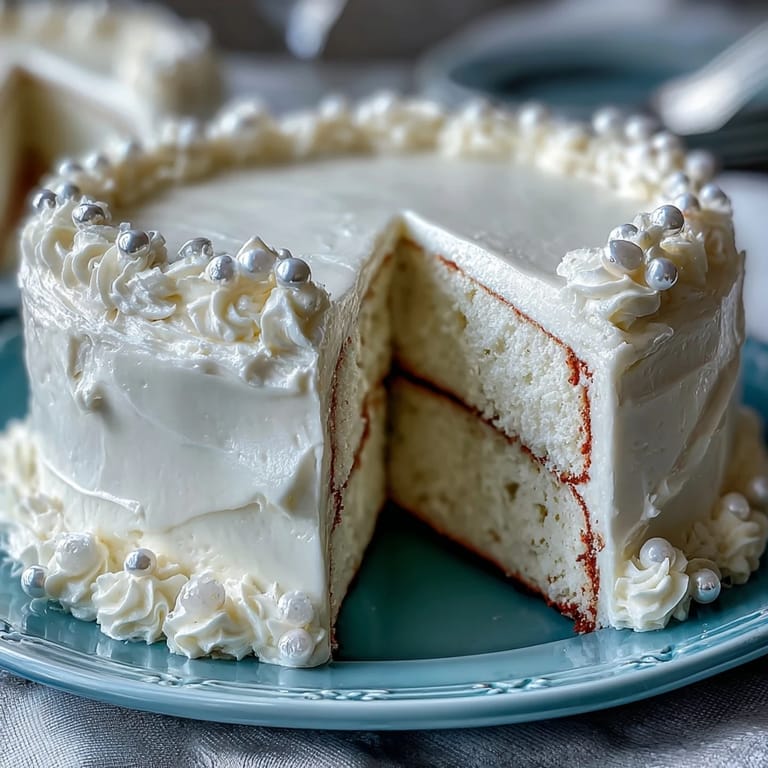
- White ready-to-roll fondant (2 lbs): Quality matters here; cheap fondant tastes waxy and tears easily, but good fondant rolls smoothly and has a pleasant vanilla flavor.
- Pearl luster dust: This is what makes the cake look like it caught moonlight—a tiny brush and light hand go a long way.
Tired of Takeout? 🥡
Get 10 meals you can make faster than delivery arrives. Seriously.
One email. No spam. Unsubscribe anytime.
Instructions
- Prep your stage:
- Grease that sheet pan thoroughly and line it with parchment—this prevents sticking and makes cleanup almost effortless. Let your oven preheat to 350°F while you gather everything else, because a fully preheated oven is the difference between a perfectly risen cake and one with a sunken center.
- Mix your dry team:
- Whisk flour, baking powder, and salt in a separate bowl so the leavening distributes evenly throughout the batter. This step prevents those random dense pockets that sometimes show up in homemade cakes.
- Cream butter and sugar until clouds form:
- Beat them together for about three minutes until the mixture looks pale, fluffy, and almost doubled in volume. This process incorporates air, which is literally what makes this cake tender rather than heavy.
- Introduce the eggs gently:
- Add one egg at a time, beating well after each:
- Each egg needs time to fully blend into the butter mixture before the next one joins the party. Rushing this step is why some cakes come out with a slightly grainy, separated texture.
- Fold in vanilla:
- Just a quick stir is all you need here.
- Alternate flour and milk in three additions:
- Start with flour, then milk, then flour, then milk, finishing with flour—this technique prevents overmixing, which toughens the crumb. Stir until just combined; you want to see a few flour streaks disappear, nothing more.
- Pour and smooth:
- Spread that batter into your prepared pan evenly, using an offset spatula to level the top. An even layer bakes more uniformly, so take a moment here.
- Bake until golden and set:
- Thirty to thirty-five minutes in a 350°F oven should do it; a toothpick inserted in the center should come out clean or with just a few moist crumbs clinging to it. Don't rely on color alone—oven temperatures vary wildly.
- Cool strategically:
- Leave it in the pan for ten minutes to firm up slightly, then turn it out onto a wire rack to cool completely. Rushing this step and decorating a warm cake will cause the fondant to slip and slide.
- Whip your buttercream into submission:
- Beat softened butter until creamy, then gradually add sifted powdered sugar (sifting matters—lumps are annoying). Add milk, vanilla, and salt, then keep beating until it's fluffy and spreadable.
- Create your fondant base:
- Spread a thin, even layer of buttercream over the completely cooled cake—this acts like glue for your fondant and also creates a moisture barrier so the fondant doesn't absorb into the cake. Use an offset spatula for a professional-looking crumb coat.
- Roll fondant with confidence:
- Dust your work surface lightly with powdered sugar, not cornstarch, which can leave a residue. Roll the fondant to about one-eighth inch thick—too thin and it tears, too thick and it looks clumsy.
- Drape and smooth:
- Lift the fondant carefully onto the cake, then use your hands or a fondant smoother to gently press it down, working out air bubbles as you go. This is where patience pays off; rushing this step creates wrinkles and crease.
- Trim the excess:
- Use a sharp knife to cut away the overhanging fondant, then smooth the edges with your fingers or a fondant tool.
- Add the shimmer:
- Using a clean, dry brush, dust pearl luster dust across the surface with light, sweeping motions. If you want extra shine, mix a tiny bit of corn syrup with water and brush it on lightly—this creates a subtle gloss.
- Arrange your decorations:
- Place edible pearls or sugar pearls in a pattern that feels meaningful, whether that's a cross, a border, or a chalice motif. Let your cake set for thirty minutes before serving so the fondant firms up.
 Save
Save What struck me most about making this cake wasn't the decorating part—it was seeing how something simple and buttery could become a centerpiece for joy. My aunt cried when she saw it, which felt disproportionate until I realized she was tearing up because her granddaughter was growing up, and this cake was marking that moment. Food is never just food.
Why Sheet Cakes Are Underrated
There's a weird hierarchy in the cake world where layer cakes get all the glamour and sheet cakes get relegated to the church basement, but I'm here to tell you that's backward. A sheet cake is actually easier to decorate, easier to serve, and somehow easier to eat—there's no architectural collapse when you cut into it, and everyone gets an equal slice. Once you cover it in fondant, nobody even remembers it's not a fancy layer cake.
The Secret Behind Fondant That Doesn't Crack
I spent my first few attempts wrestling with fondant that cracked and tore as soon as I tried to smooth it, and then I realized the problem was my technique, not the fondant itself. Rolling it slowly and keeping your hands slightly warm helps it relax and stretch without breaking. Work on a clean surface with just enough powdered sugar to prevent sticking—too much flour makes it dry and brittle.
Making It Memorable Beyond Just the Look
A cake that looks beautiful but tastes forgettable is just a disappointment waiting to happen, so make sure your buttercream isn't overly sweet or your cake isn't dry. Serve it with fresh berries or a light fruit coulis if you want to add brightness and cut through the richness. This cake deserves to taste as good as it looks.
- Bake the cake a full day ahead and wrap it tightly—it actually improves in texture and moisture overnight.
- Keep fondant in an airtight container after opening until you're ready to use it, or it'll dry out and become impossible to work with.
- If your kitchen is warm, keep rolled fondant in the refrigerator for ten minutes before draping it on the cake so it firms up slightly.
 Save
Save This cake has taught me that sometimes the most elegant celebration cakes are the ones that don't try too hard. It feeds a crowd, looks like it came from a bakery, and tastes like someone genuinely cared about the people eating it.
Recipe FAQs
- → What is the best way to keep the cake moist?
Using room temperature eggs and carefully alternating additions of flour and milk helps maintain a tender, moist texture in the cake.
- → How can I achieve a smooth finish with fondant?
Rolling fondant to an even 1/8-inch thickness and smoothing it gently over the cake with hands or a fondant smoother ensures a flawless surface.
- → Can I prepare this ahead of time?
Yes, the cake can be baked a day in advance and wrapped well before decorating to streamline the process.
- → What alternatives can enhance the flavor?
For a lighter flavor note, substituting half the vanilla with almond extract adds a subtle variation.
- → Are there any special tools needed?
A sheet pan, mixing bowls, rolling pin, fondant smoother, and food-safe brush are recommended for best results.