 Save
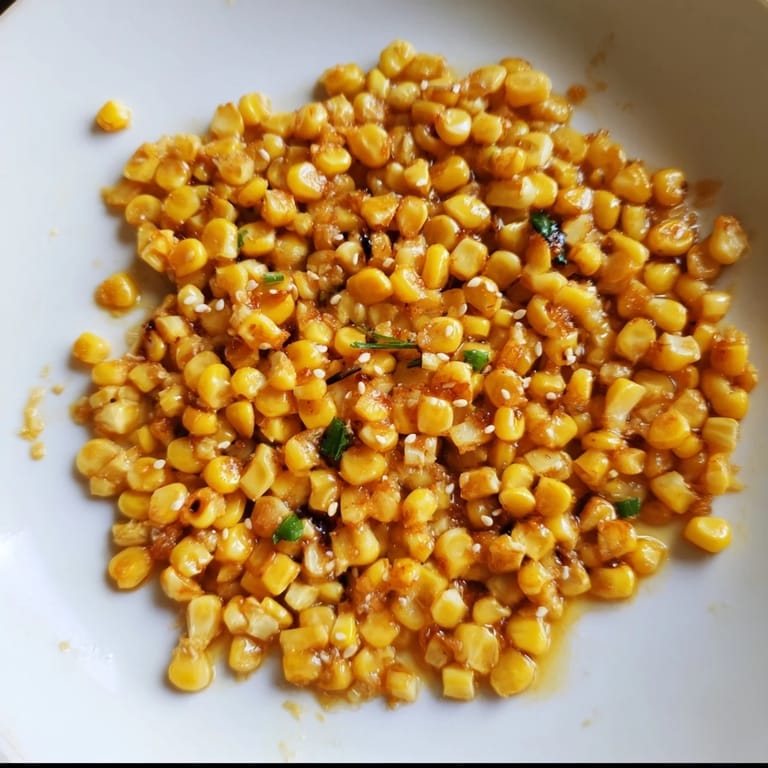
Save There's something about late summer that makes me crave corn in every form, and this Japanese butter corn caught me completely off guard at a small izakaya in Tokyo. The way the garlic melted into the butter, how the soy sauce glistened on each kernel—it was the kind of side dish that made me stop reaching for other things on the table. When I got home, I spent an afternoon in my kitchen trying to recreate that exact moment, and somehow, this simple technique became something I make constantly now.
My partner took one bite at a dinner party and immediately asked me to make it again the next week. That's when I knew this wasn't just a side dish—it was a quiet crowd-pleaser that somehow made everything else on the plate taste better. Now whenever friends ask for an easy contribution to a potluck, this is my automatic answer.
Ingredients
- Fresh corn or frozen kernels: Four ears husked, or three cups thawed frozen corn—either works beautifully, and frozen is honestly more convenient than cutting kernels from a hot cob in July.
- Unsalted butter: Two tablespoons is the golden ratio; it creates that foamy base where the garlic comes alive without the salt competing with the soy sauce later.
- Garlic, finely minced: Two cloves, and don't rush mincing them—fine pieces distribute evenly and cook in seconds rather than minutes.
- Soy sauce: One and a half tablespoons brings umami depth; use gluten-free if that matters to you, and the flavor stays just as rich.
- Freshly ground black pepper: Half a teaspoon finishes the dish with a whisper of heat that cuts through the richness.
- Sea salt: A small pinch if you want it, though the soy sauce often provides enough.
- Scallions and sesame seeds for garnish: A tablespoon of chopped scallions and a teaspoon of toasted sesame seeds add texture and a subtle nuttiness that elevates the whole thing.
Tired of Takeout? 🥡
Get 10 meals you can make faster than delivery arrives. Seriously.
One email. No spam. Unsubscribe anytime.
Instructions
- Prepare your corn:
- If using fresh ears, hold the cob steady and use a sharp knife to slice downward, rotating as you go—the kernels will fall cleanly onto your cutting board. If using frozen, just thaw and drain well.
- Melt the butter into a fragrant base:
- In a large skillet over medium heat, watch the butter transform from solid to foamy and pale golden. It should smell sweet and toasted, never brown.
- Toast the garlic gently:
- Add your minced garlic and stir constantly for about 30 seconds—you're looking for it to become fragrant but still pale, not darkened. This step takes discipline but makes all the difference in flavor.
- Add the corn and let it warm through:
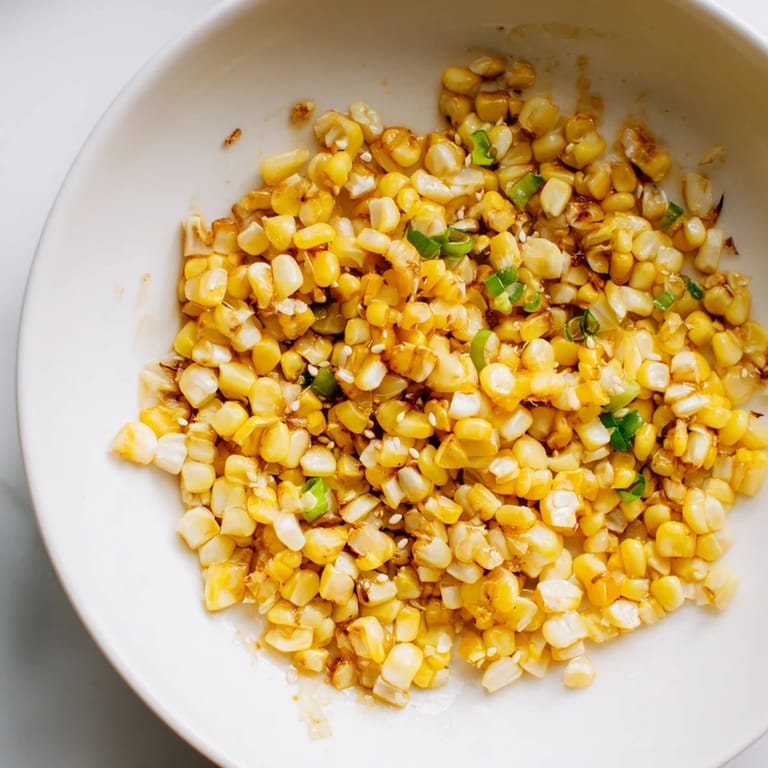
- Stir the kernels into the garlicky butter and cook for four to five minutes, stirring occasionally. Listen for the slight crackling sound as the corn begins to caramelize at the edges; that's when you know it's developing color and sweetness.
- Introduce the soy sauce:
- Pour it in and stir immediately to coat every kernel. Let it cook for another minute or two, watching as most of the liquid evaporates and leaves behind a glossy, umami-rich coating.
- Season and taste:
- Crack black pepper over the top and add a tiny pinch of salt if needed. Taste it—you might be surprised at how complete it already feels.
- Garnish and serve:
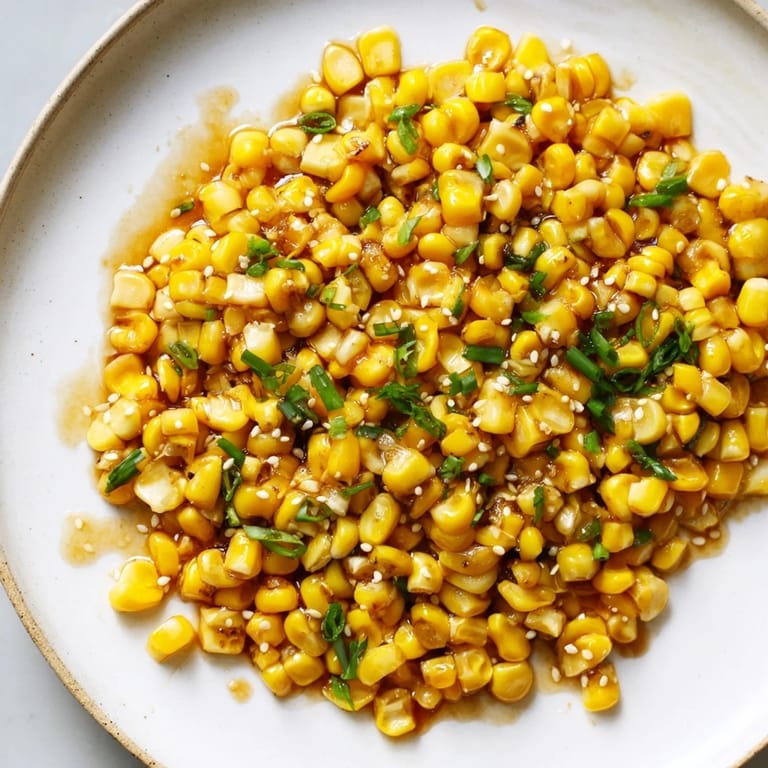
- Transfer to a serving dish, scatter scallions and sesame seeds across the top if you're using them, and serve while everything is still warm and the scallions have a bit of crunch.
 Save
Save My roommate once asked why corn had never tasted like this before, and I realized it's because this dish respects the vegetable while also dressing it up. It's a small moment, really, but it's the kind of meal addition that makes people linger at the table a little longer.
Why Frozen Corn Works Just Fine
I used to feel like I was cheating using frozen corn, but after making this same dish a dozen times with both fresh and thawed kernels, I can tell you there's almost no difference in the final result. Frozen corn is actually faster to work with and often tastes sweeter because it's frozen at peak ripeness. The real key is thawing it properly and draining it well so you're not adding extra moisture to the skillet.
Playing with Variations
Once you understand how this formula works, it becomes a foundation for experimentation. A teaspoon of mayonnaise stirred in when you add the soy sauce brings a subtle richness that feels almost indulgent. A small splash of mirin adds sweetness without being obvious about it. I've even tried a drizzle of toasted sesame oil at the very end, which creates a deeper, more complex flavor profile.
Serving and Pairing Ideas
This corn shines alongside grilled meats at a summer barbecue, tucked beside a mound of fluffy rice at dinner, or stirred into ramen just before serving where it becomes something between a vegetable and a flavor amplifier. It's also unexpectedly good as a topping for buttered toast or stirred into cold rice the next day for a quick lunch. The versatility is part of what makes me come back to it so often.
- Serve hot alongside grilled chicken, fish, or beef for a complete meal.
- Layer it over steamed rice as a simple vegetable dish that needs nothing else.
- Top warm ramen with a generous spoonful just before eating for texture and umami depth.
 Save
Save This recipe proves that the most memorable dishes aren't always complicated—sometimes they're just done with attention and the right combination of flavors. Make it once, and it becomes one of those recipes you reach for again and again.
Recipe FAQs
- → Can I use frozen corn instead of fresh?
Yes, thawed frozen corn works well and saves prep time without sacrificing flavor.
- → How to adjust seasoning for gluten-free diets?
Use certified gluten-free soy sauce to keep the dish gluten-free and maintain the savory profile.
- → What garnishes enhance this side dish?
Chopped scallions and toasted sesame seeds add texture and brightness to the finished corn.
- → Can this dish be made dairy-free?
Substitute unsalted butter with plant-based butter alternatives to keep it dairy-free.
- → How long should I sauté the corn?
Cook the corn for about 4–5 minutes until heated through and lightly golden before adding soy sauce.