 Save
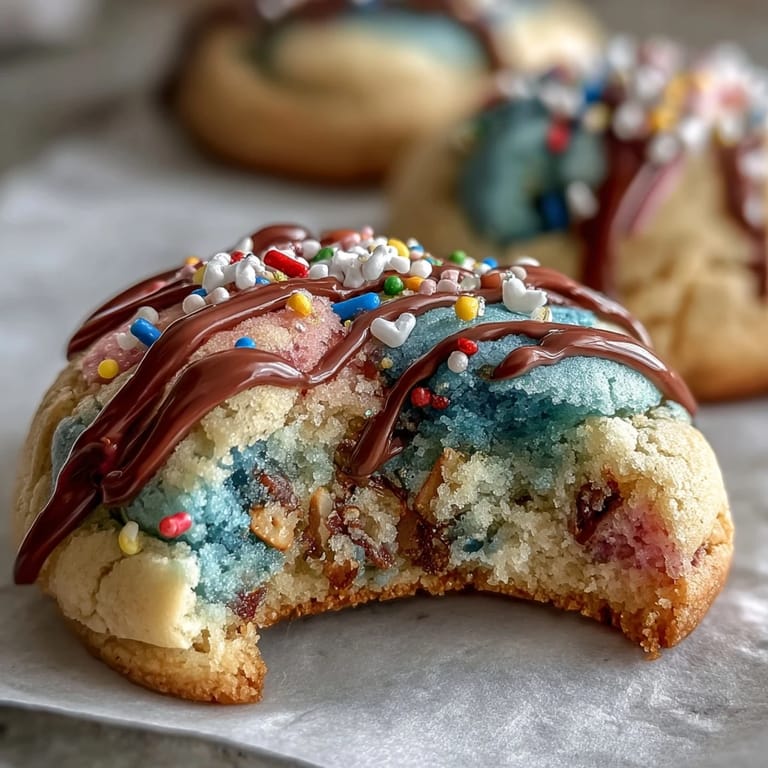
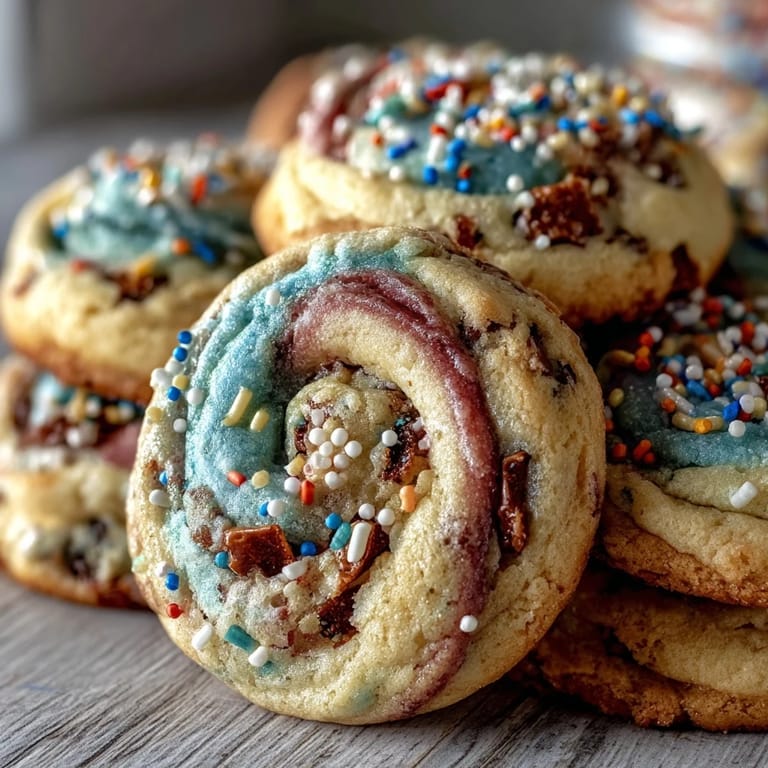
Save My niece was turning seven, and she'd been obsessed with Cookie Run Kingdom for months—collecting every character, learning their backstories, drawing them constantly. I wanted to make her birthday special, so I decided to bake cookies that looked like they'd jumped straight out of the game, with those signature pastel swirls that make everything in that world feel magical. The moment she saw the twisted rainbow dough in the oven, her eyes went wide in that way that reminds you why baking for people you love matters so much.
I made these for a surprise office birthday party last spring, and watching my coworkers' faces when they bit into one and tasted that subtle almond undertone was such a small joy. Someone even asked if I'd bought them from a fancy bakery, which felt like the highest compliment a home baker could receive. That's when I realized these cookies had crossed from "cute idea" into something people genuinely wanted to eat again and again.
Ingredients
- All-purpose flour (2 1/2 cups): The foundation that keeps these cookies soft rather than crispy—don't sift obsessively or you'll end up with tough cookies, just whisk gently to break up any lumps.
- Unsalted butter (1 cup, room temperature): Cold butter won't cream properly, so pull it out 30 minutes ahead and let it soften naturally—your stand mixer will thank you.
- Granulated sugar (1 cup): This creates the tender crumb and helps with that slight spread that makes the edges catch the oven's heat just right.
- Egg (1 large): Binds everything together and adds richness without making the dough greasy.
- Vanilla and almond extracts: The vanilla is non-negotiable, but the almond extract is the secret ingredient that makes people pause and ask what that subtle flavor is.
- Baking powder (1/2 tsp): Just enough to give them a gentle lift without making them cake-like.
- Salt (1/4 tsp): Brightens all the flavors and balances the sweetness in a way that makes you want another cookie.
- Gel food coloring: Use gel, never liquid, because liquid coloring will make your dough wet and sticky—this is learned wisdom from my first batch.
- Pastel sprinkles (1/4 cup): The finishing touch that catches light and makes each cookie feel like a tiny edible artwork.
Tired of Takeout? 🥡
Get 10 meals you can make faster than delivery arrives. Seriously.
One email. No spam. Unsubscribe anytime.
Instructions
- Prepare your dry team:
- Whisk together your flour, baking powder, and salt in a medium bowl, breaking up any flour clumps as you go. Set this aside so you're ready to go when your butter mixture is ready.
- Cream the butter and sugar:
- In a large bowl with an electric mixer, beat the softened butter and sugar together for about 2 to 3 minutes until it's pale, fluffy, and noticeably lighter in texture—this is the magic that creates tender cookies. Stop occasionally to scrape down the bowl so nothing hiding at the edges gets left behind.
- Add the wet ingredients:
- Drop in your egg, vanilla extract, and almond extract if you're using it, mixing until everything is well combined and the mixture looks creamy and unified. This should take about a minute of gentle mixing.
- Bring it together gently:
- Add your dry ingredients to the wet mixture gradually, mixing on low speed just until the flour disappears—overmixing develops gluten and makes cookies tough, which is not what we're going for. Stop as soon as you can't see flour streaks anymore.
- Color your dough:
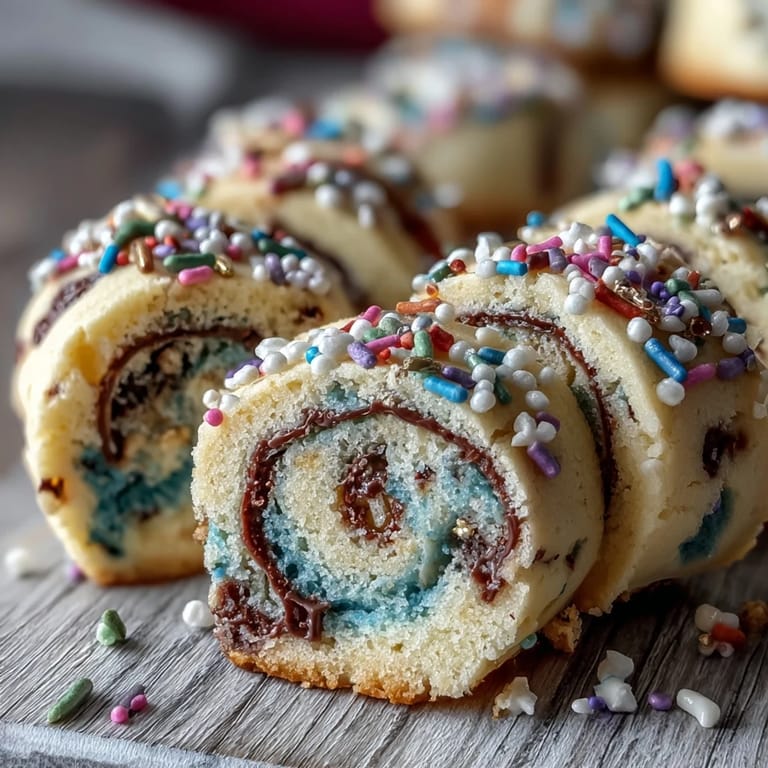
- Divide the dough into three or four portions depending on how many pastel colors you want, then add a small drop or two of gel food coloring to each and knead gently with your hands until the color is evenly distributed. This takes just a minute per color and is honestly the most fun part.
- Create the swirl:
- Roll each colored dough into a long rope about 12 inches long, then gently lay them side by side and twist them together loosely—too tight and you lose that swirly pattern when you slice them. If the log becomes unwieldy, slice it in half and work with one piece at a time.
- Chill and firm up:
- Wrap your dough log tightly in plastic wrap and refrigerate for at least 2 hours, or overnight if you want to bake tomorrow—the cold makes slicing clean and prevents the swirls from blurring together in the oven. This waiting time is when the flavors meld too, making the cookies taste even better.
- Preheat and prepare:
- Heat your oven to 350°F and line your baking sheets with parchment paper so the cookies slide off easily when they cool.
- Slice with intention:
- Remove your dough from the fridge and slice it into 1/4-inch thick rounds using a sharp knife—a sawing motion rather than pressing down helps you keep those beautiful swirls intact. Space them about 2 inches apart on your prepared baking sheets.
- Optional sparkle:
- If you're using pastel sprinkles, press a few gently onto the top of each cookie now, while the dough is still cold enough for them to stick.
- Bake to golden edges:
- Slide them into the oven for 10 to 12 minutes—they should be set in the center but still look slightly underbaked, with just the faintest golden color appearing at the edges. They'll continue cooking slightly as they cool, which is how you keep them soft.
- Cool with patience:
- Let the cookies rest on the baking sheet for 5 minutes so they firm up enough to move, then transfer them to a wire rack to cool completely. Resist the urge to bite into them immediately, though I understand if you can't.
 Save
Save There's something about watching someone bite into a cookie and seeing their face light up when they taste how soft and buttery it is, knowing you made that happen with your hands. These cookies stopped being just a birthday gift and became a memory—the kind that makes someone text you months later saying they've been craving them.
The Art of Not Overmixing
One of the biggest mistakes I see happen in cookie baking is when people keep mixing after the flour disappears, thinking they need to beat it into submission for a smoother dough. The truth is that less mixing is almost always better—your cookies will be tender and delicate instead of dense and tough. I learned this by comparing a batch I overmixed with one I stopped mixing as soon as the flour wasn't visible anymore, and the difference was night and day.
Why Temperature Matters More Than You Think
Room temperature butter mixes into sugar and creates that light, fluffy base that makes cookies tender and cakey rather than dense and hard. If your butter is too cold, you'll end up mixing for twice as long and still won't get the same result—plus you risk overworking the dough. I keep a stick of butter on my counter while I gather other ingredients, and it's always ready exactly when I need it.
Storage and Sharing Secrets
These cookies stay soft for five days in an airtight container at room temperature, but they're honestly best within the first three days when the butter is still singing through. They freeze beautifully for up to two months if you layer them between parchment in a freezer-safe container, which means you can bake these whenever you need to impress someone without the time crunch.
- For extra flavor dimension, add the zest of one lemon or orange to your butter and sugar mixture—it's subtle but makes people ask what makes them taste so special.
- If you're making these for a crowd, you can prepare the dough logs days in advance and slice and bake them fresh whenever you need hot, soft cookies.
- These make incredible gifts when you stack them in a pretty jar with a ribbon, because homemade cookies wrapped with care hit different than store-bought every single time.
 Save
Save These cookies are more than sugar and butter—they're an excuse to slow down, play with color, and create something that makes people smile. Every time you make them, you get to imagine the moment someone bites into one and tastes the love you baked into it.
Recipe FAQs
- → How do I get vibrant pastel colors without changing dough texture?
Use gel food coloring, which adds bright hues without adding extra liquid, preserving dough consistency and softness.
- → Can I prepare the dough ahead of time?
Yes, chill the twisted dough logs wrapped in plastic for at least 2 hours or refrigerate overnight before slicing and baking.
- → What causes cookies to be soft instead of crispy?
A higher butter content, careful mixing to avoid gluten overdevelopment, and slightly underbaking contribute to a soft texture.
- → How do I create the pastel swirl effect?
Divide dough into portions tinted with different pastel gel colors, roll each into ropes, then twist and roll together before chilling.
- → Can these cookies be stored after baking?
Store cookies in an airtight container at room temperature for up to 5 days or freeze for up to 2 months to maintain freshness.